设备
| 主机名 | 主机角色 | IP | 配置 |
|---|---|---|---|
| CentOS7_CICD_GitLab | 代码托管服务器 | 192.168.174.110 | 2核心CPU/4G内存/50G硬盘 |
| CentOS7_CICD_Jenkins | 持续集成服务器 | 192.168.174.111 | 2核心CPU/4G内存/50G硬盘 |
| CentOS7_CICD_Web | 生产环境web服务器 | 192.168.174.112 | 2核心CPU/4G内存/50G硬盘 |

GitLab
GitLab主机上:
vim /etc/gitlab/gitlab.rb
#...
external_url='http://IP' #修改

gitlab-ctl reconfigure

#登录web页面

账号:root
vim /etc/gitlab/initial_root_password #原密码这里面

#改中文界面
#改密码
12345678
建立组、项目

上传代码
在要上传代码的主机上:
yum install git -y

#标识上传代码的人
#设置全局用户名
git config --global user.name "Administrator"
#设置邮箱
git config --global user.email "admin@example.com"

#web代码
cd /root/wordpress
git init #初始化当前目录为空的git版本库
git add .   #添加到缓存区
git commit -m '测试用例'   #提交到本地仓库并添加描述
git remote add origin http://192.168.174.110/test/wordpress.git
#将GitLab远程仓库添加到本地,名叫origin
git push -u origin --all #推送到仓库中,输入GitLab的账号密码;在第一次推送本地分支到远程仓库时,使用 -u 参数可以将本地分支和远程分支关联起来。

也可以配置公钥,使用ssh上传,比较方便。

Jenkins安装
yum install fontconfig java-11-openjdk -y   #web页面字体包、jdk

yum localinstall jenkins-2.452.3-1.1.noarch.rpm

systemctl enable jenkins --now

yum install git -y
访问8080端口
cat /var/lib/jenkins/secrets/initialAdminPassword
Jenkins账密

admin

1
版本过低可能导致插件安装失败
Web主机上:
Nginx
yum install nginx-1.20.1 -yPHP
安装php7.2

vim /etc/php-fpm.d/www.conf

#指定PHP程序运行时的用户和组为Nginx
user = nginx
group = nginx

vim /etc/php.ini

#取消注释,修改PHP时区为亚洲/上海
date.timezone ="Asia/shanghai"
网站配置文件
rm -rf /etc/nginx/conf.d/*

vim /etc/nginx/conf.d/wordpress.conf
内容如下:

server {
        listen 80;
        server_name _;
        root /html;

        location / {
                index index.php;
        }

        #设置静态资源缓存
        location ~* \.(jpg|jpeg|gif|png|css|js|ico|xml)$ {
            access_log off;
            log_not_found off;
            expires 30d;
        }

        #配置nginx连接php
        location ~ \.php$ {
            root           /html;
            fastcgi_pass   127.0.0.1:9000;
            fastcgi_index  index.php;
            fastcgi_param  SCRIPT_FILENAME  $document_root$fastcgi_script_name;
            include        fastcgi_params;
         }

}

chown nginx.nginx /html

 vim /etc/nginx/nginx.conf

改一下网站root目录,/html
systemctl enable nginx php-fpm --now
MySQL
rpm -ivh https://dev.mysql.com/get/mysql57-community-release-el7-10.noarch.rpm

rpm --import https://repo.mysql.com/RPM-GPG-KEY-mysql-2022

yum install mysql-server -y

systemctl enable mysqld --now

grep -i password /var/log/mysqld.log

mysql -uroot -p'密码'

> set global validate_password_policy=0;

> alter user root@"localhost" identified by "admin123456";

vim /etc/my.cnf

[mysqld]
#码复杂度策略
validate_password_policy=0

#设置字符集支持中文
character-set-server=utf8

systemctl restart mysqld

mysql -uroot -padmin123456

> CREATE USER 'root'@'%' IDENTIFIED BY 'admin123456';
> GRANT ALL PRIVILEGES ON *.* TO 'root'@'%' IDENTIFIED BY 'admin123456';
> FLUSH PRIVILEGES;
> create database wordpress;
改一下wordpress的wp-conf.php,再git push一下。

git add .   #添加当前目录文件到这个库
git commit -m '测试用例'   #提交并添加描述
git push -u origin --all
Jenkins通过脚本打包、发布项目
新建item
添加凭据
使用GitLab有拉取权限的用户密码,这里使用了root 12345678
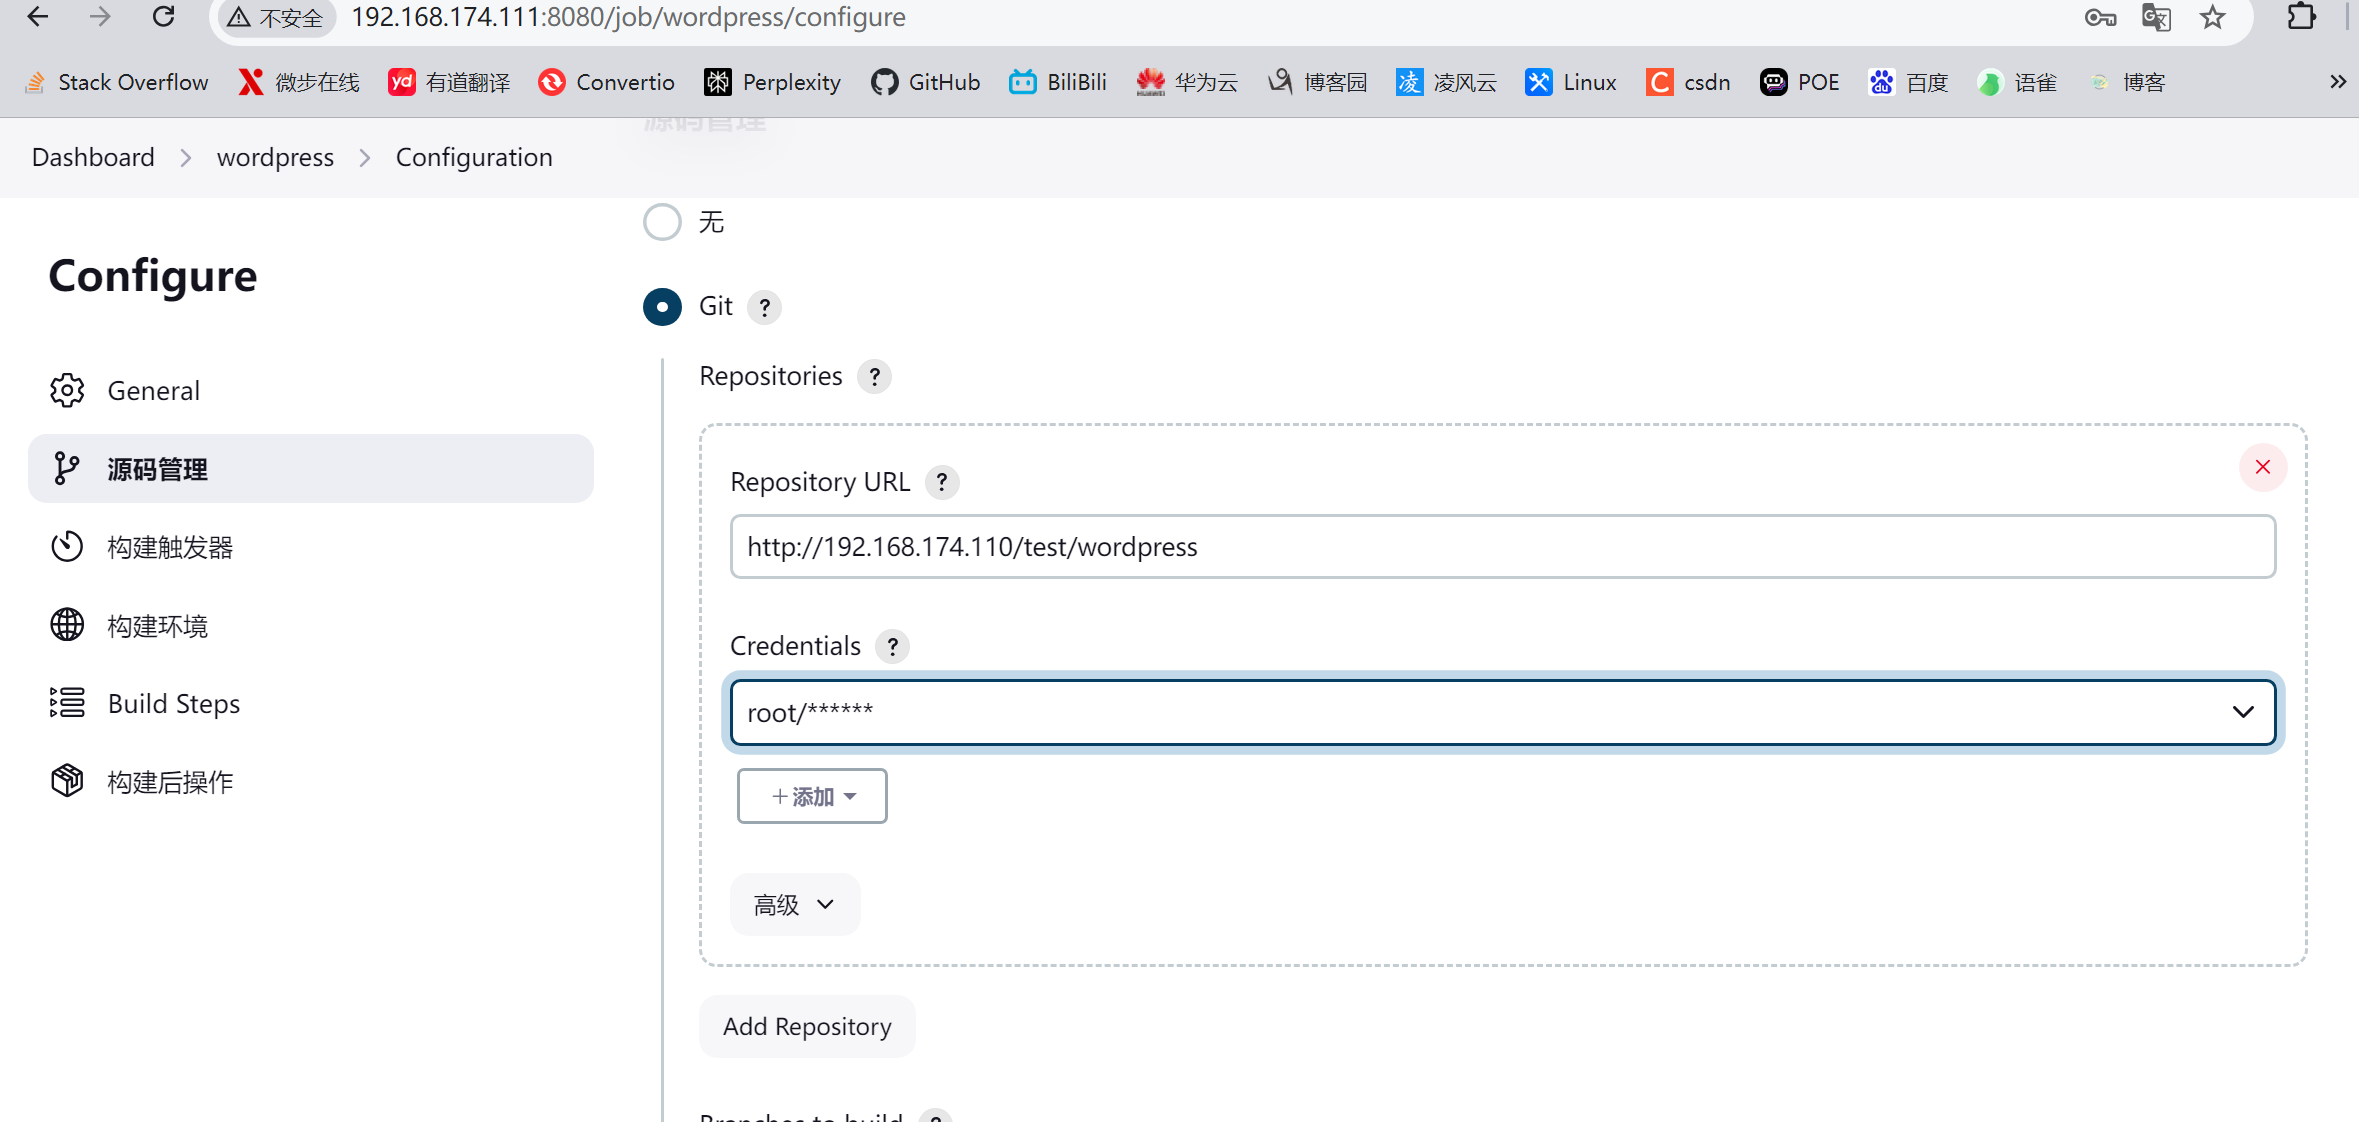
构建

拉取到Jenkins本地,进行代码编译、审查、打包工作。
cd /var/lib/jenkins
mkdir script
cd script
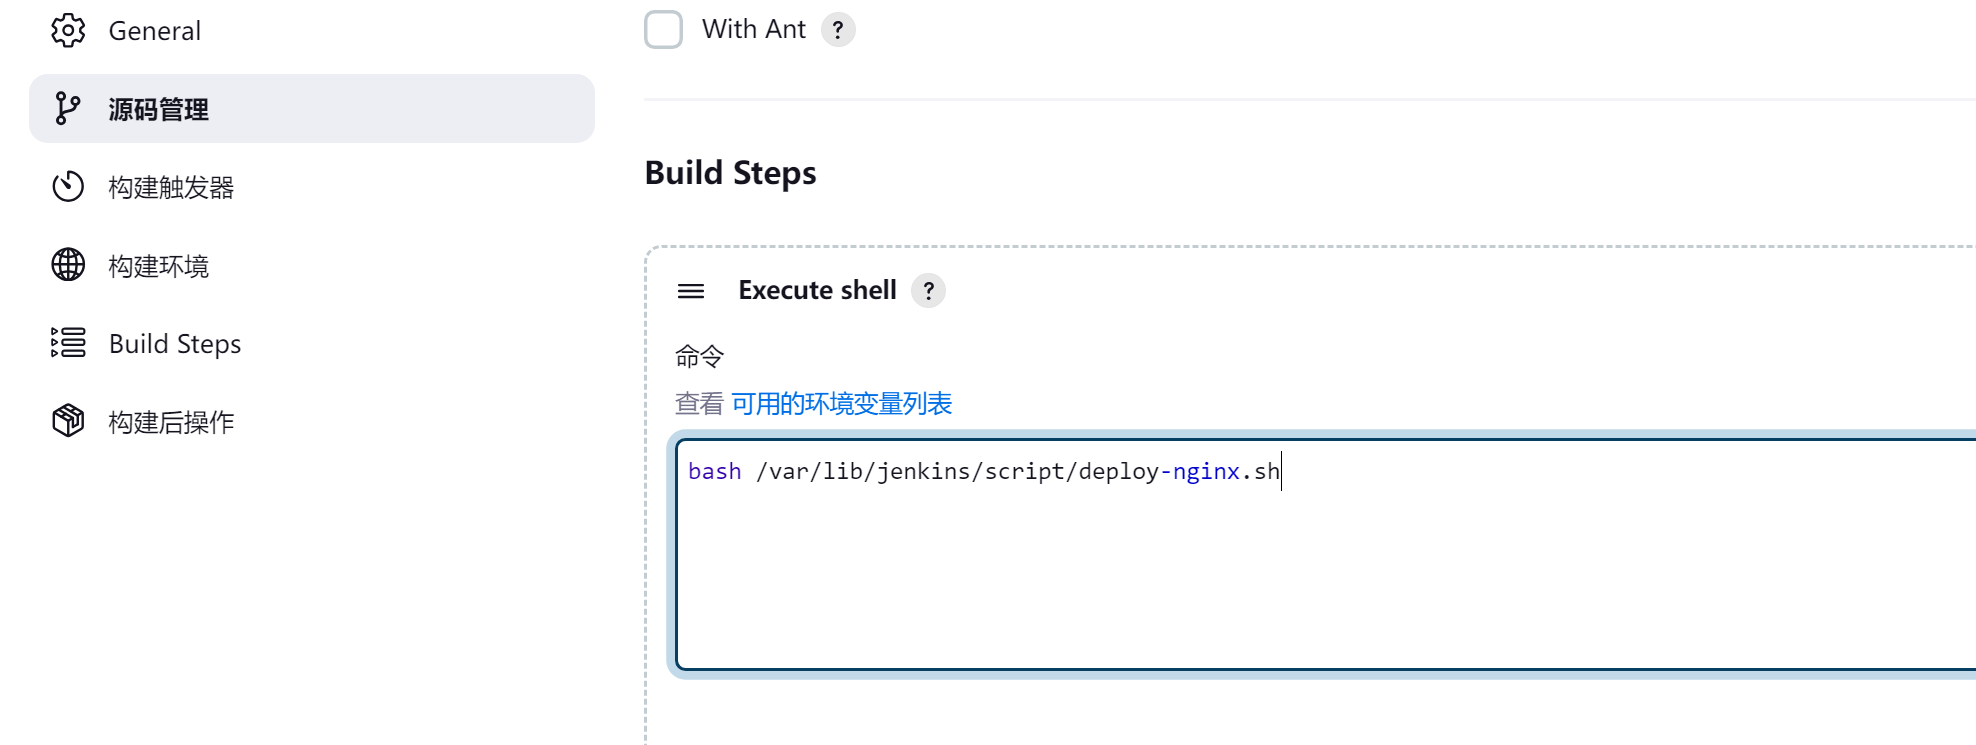
vim deploy-nginx.sh
打包发布脚本内容如下:
#!/bin/bash
#发布项目到Nginx
#定义Nginx网页根目录
WEB_DIR=/
#定义Jenkins.项目所在路径
CODE_DIR=/var/lib/jenkins/workspace/wordpress
#项目发布时间
TIME=$(date +%F-%H-%M-%S)
#打包项目
cd $CODE_DIR && tar -zcf /tmp/web-$TIME.tar.gz ./*
#发布项目
for IP in $(cat /var/lib/jenkins/script/nginx)
do
scp /tmp/web-$TIME.tar.gz root@$IP:$WEB_DIR
ssh root@$IP "cd $WEB_DIR && mkdir web-$TIME"
ssh root@$IP "cd $WEB_DIR && tar -xf web-$TIME.tar.gz -C web-$TIME && rm -rf web-$TIME.tar.gz"
ssh root@$IP "cd $WEB_DIR && rm -rf html && ln -s web-$TIME html"
ssh root@$IP "cd $WEB_DIR && chown -R nginx.nginx html"
done
chmod +x deploy-nginx.sh #加执行权限#Web主机IP写入文件nginx
vim nginx
192.168.174.112在web界面中使用jenkins用户执行脚本,需要更改以下内容:
jenkins:x:997:995:Jenkins Automation Server:/var/lib/jenkins:/bin/false
#shell不对,修改
usermod -s /bin/bash jenkins
su - jenkins #以jenkins身份进入家目录,验证一下脚本执行情况
ssh-keygen #生成公钥,发给Web服务器,使用密钥实现免密码登录
cd ./script
for ip in $(cat /var/lib/jenkins/script/nginx)
do
> ssh-copy-id root@$ip
> done
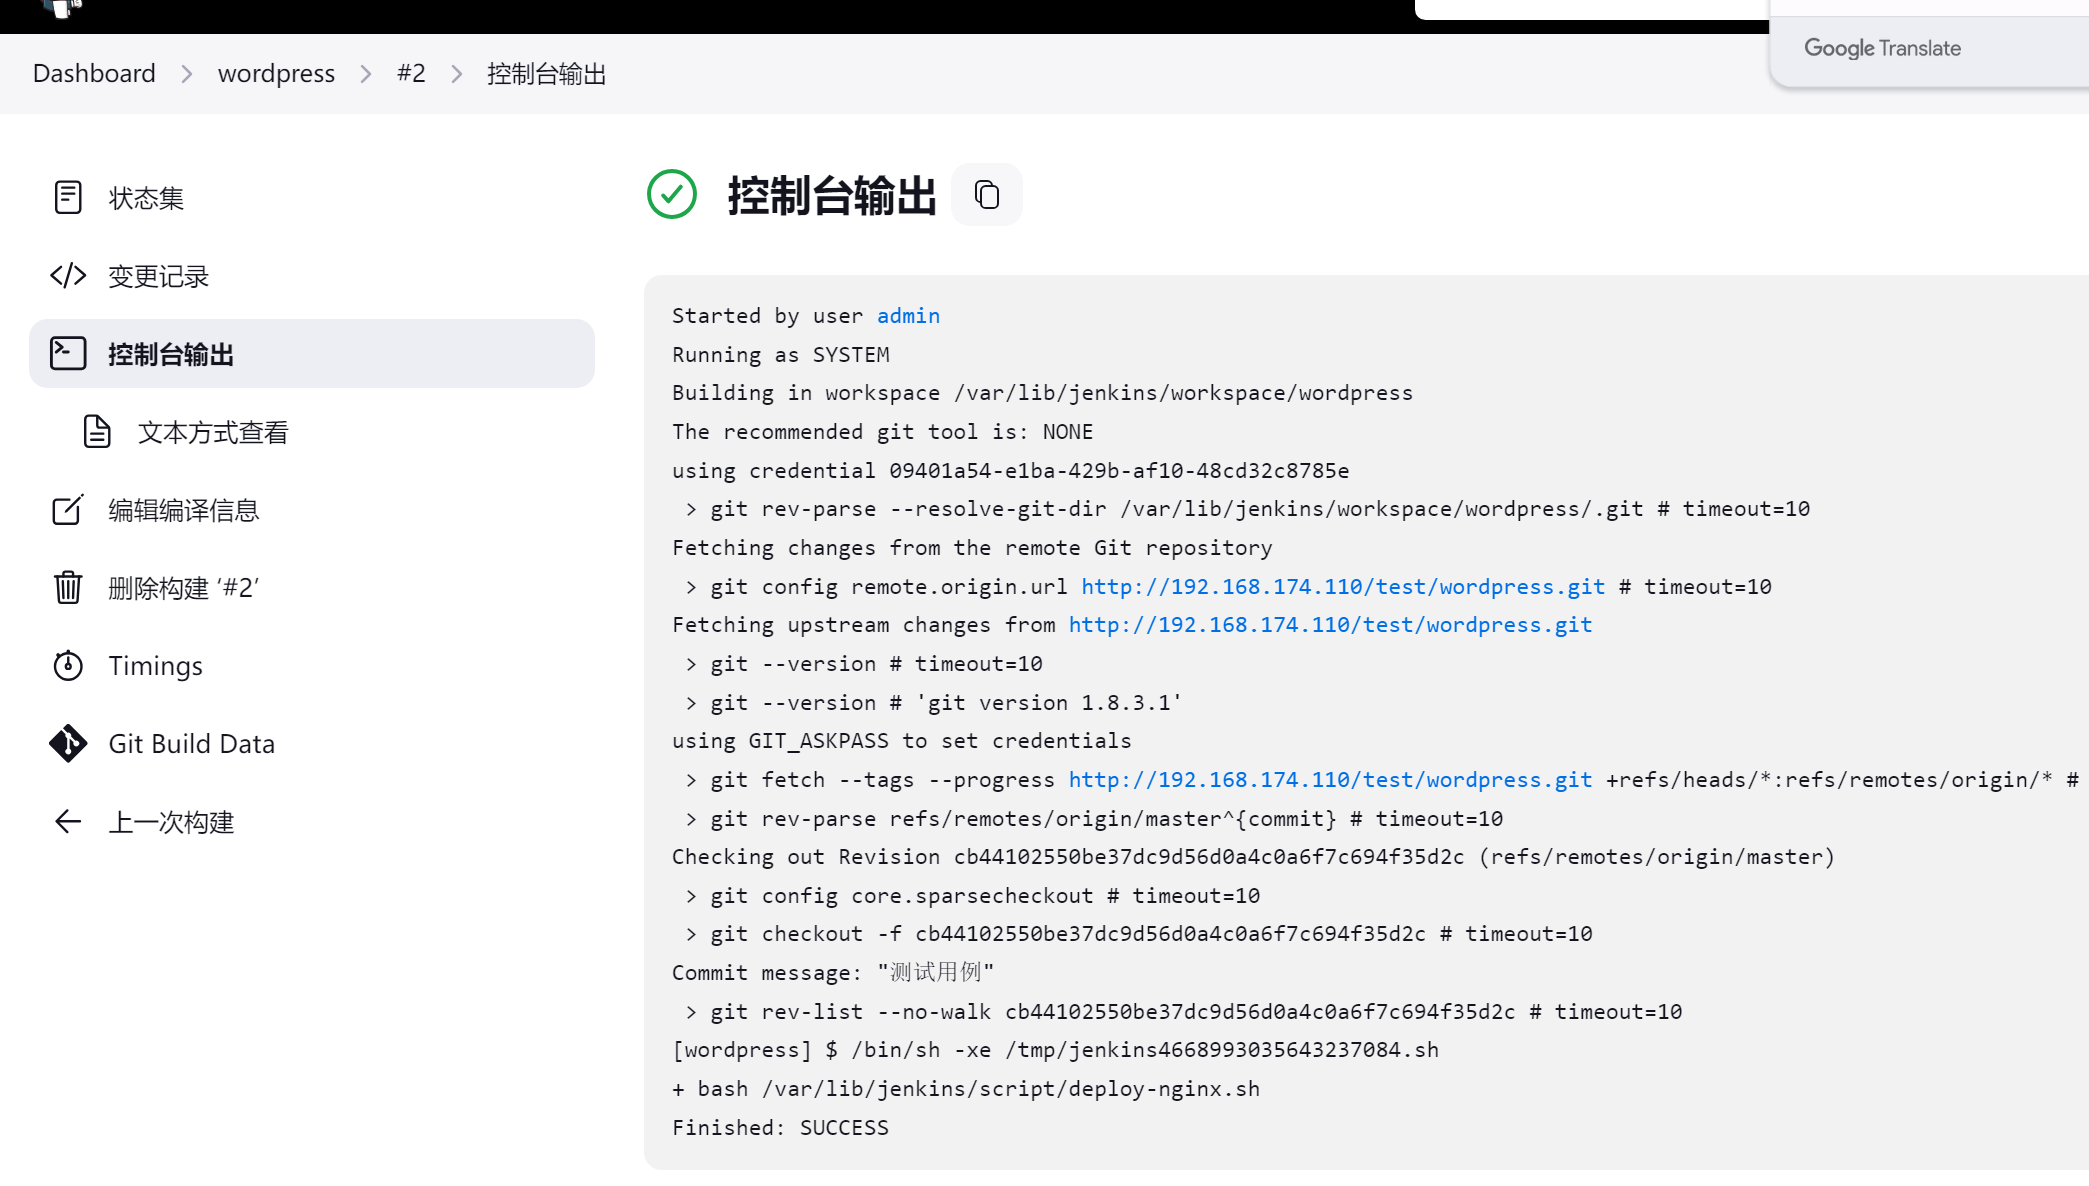
bash deploy-nginx.sh #验证
去web主机查看结果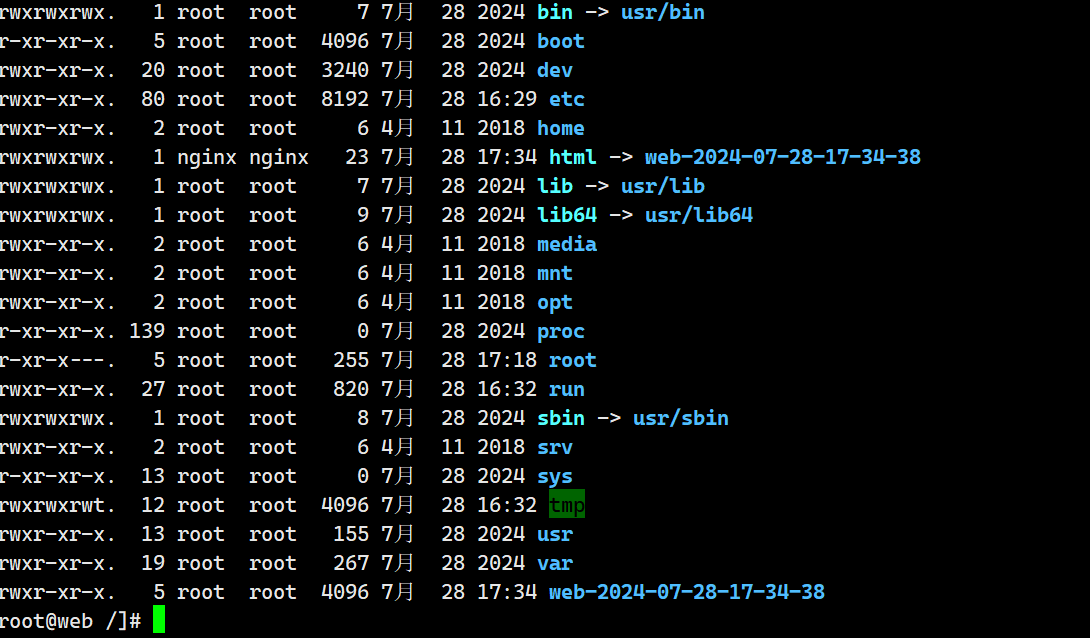

在jinkins上添加构建步骤,实现一键发版

本文作者为A9bot,转载请注明。